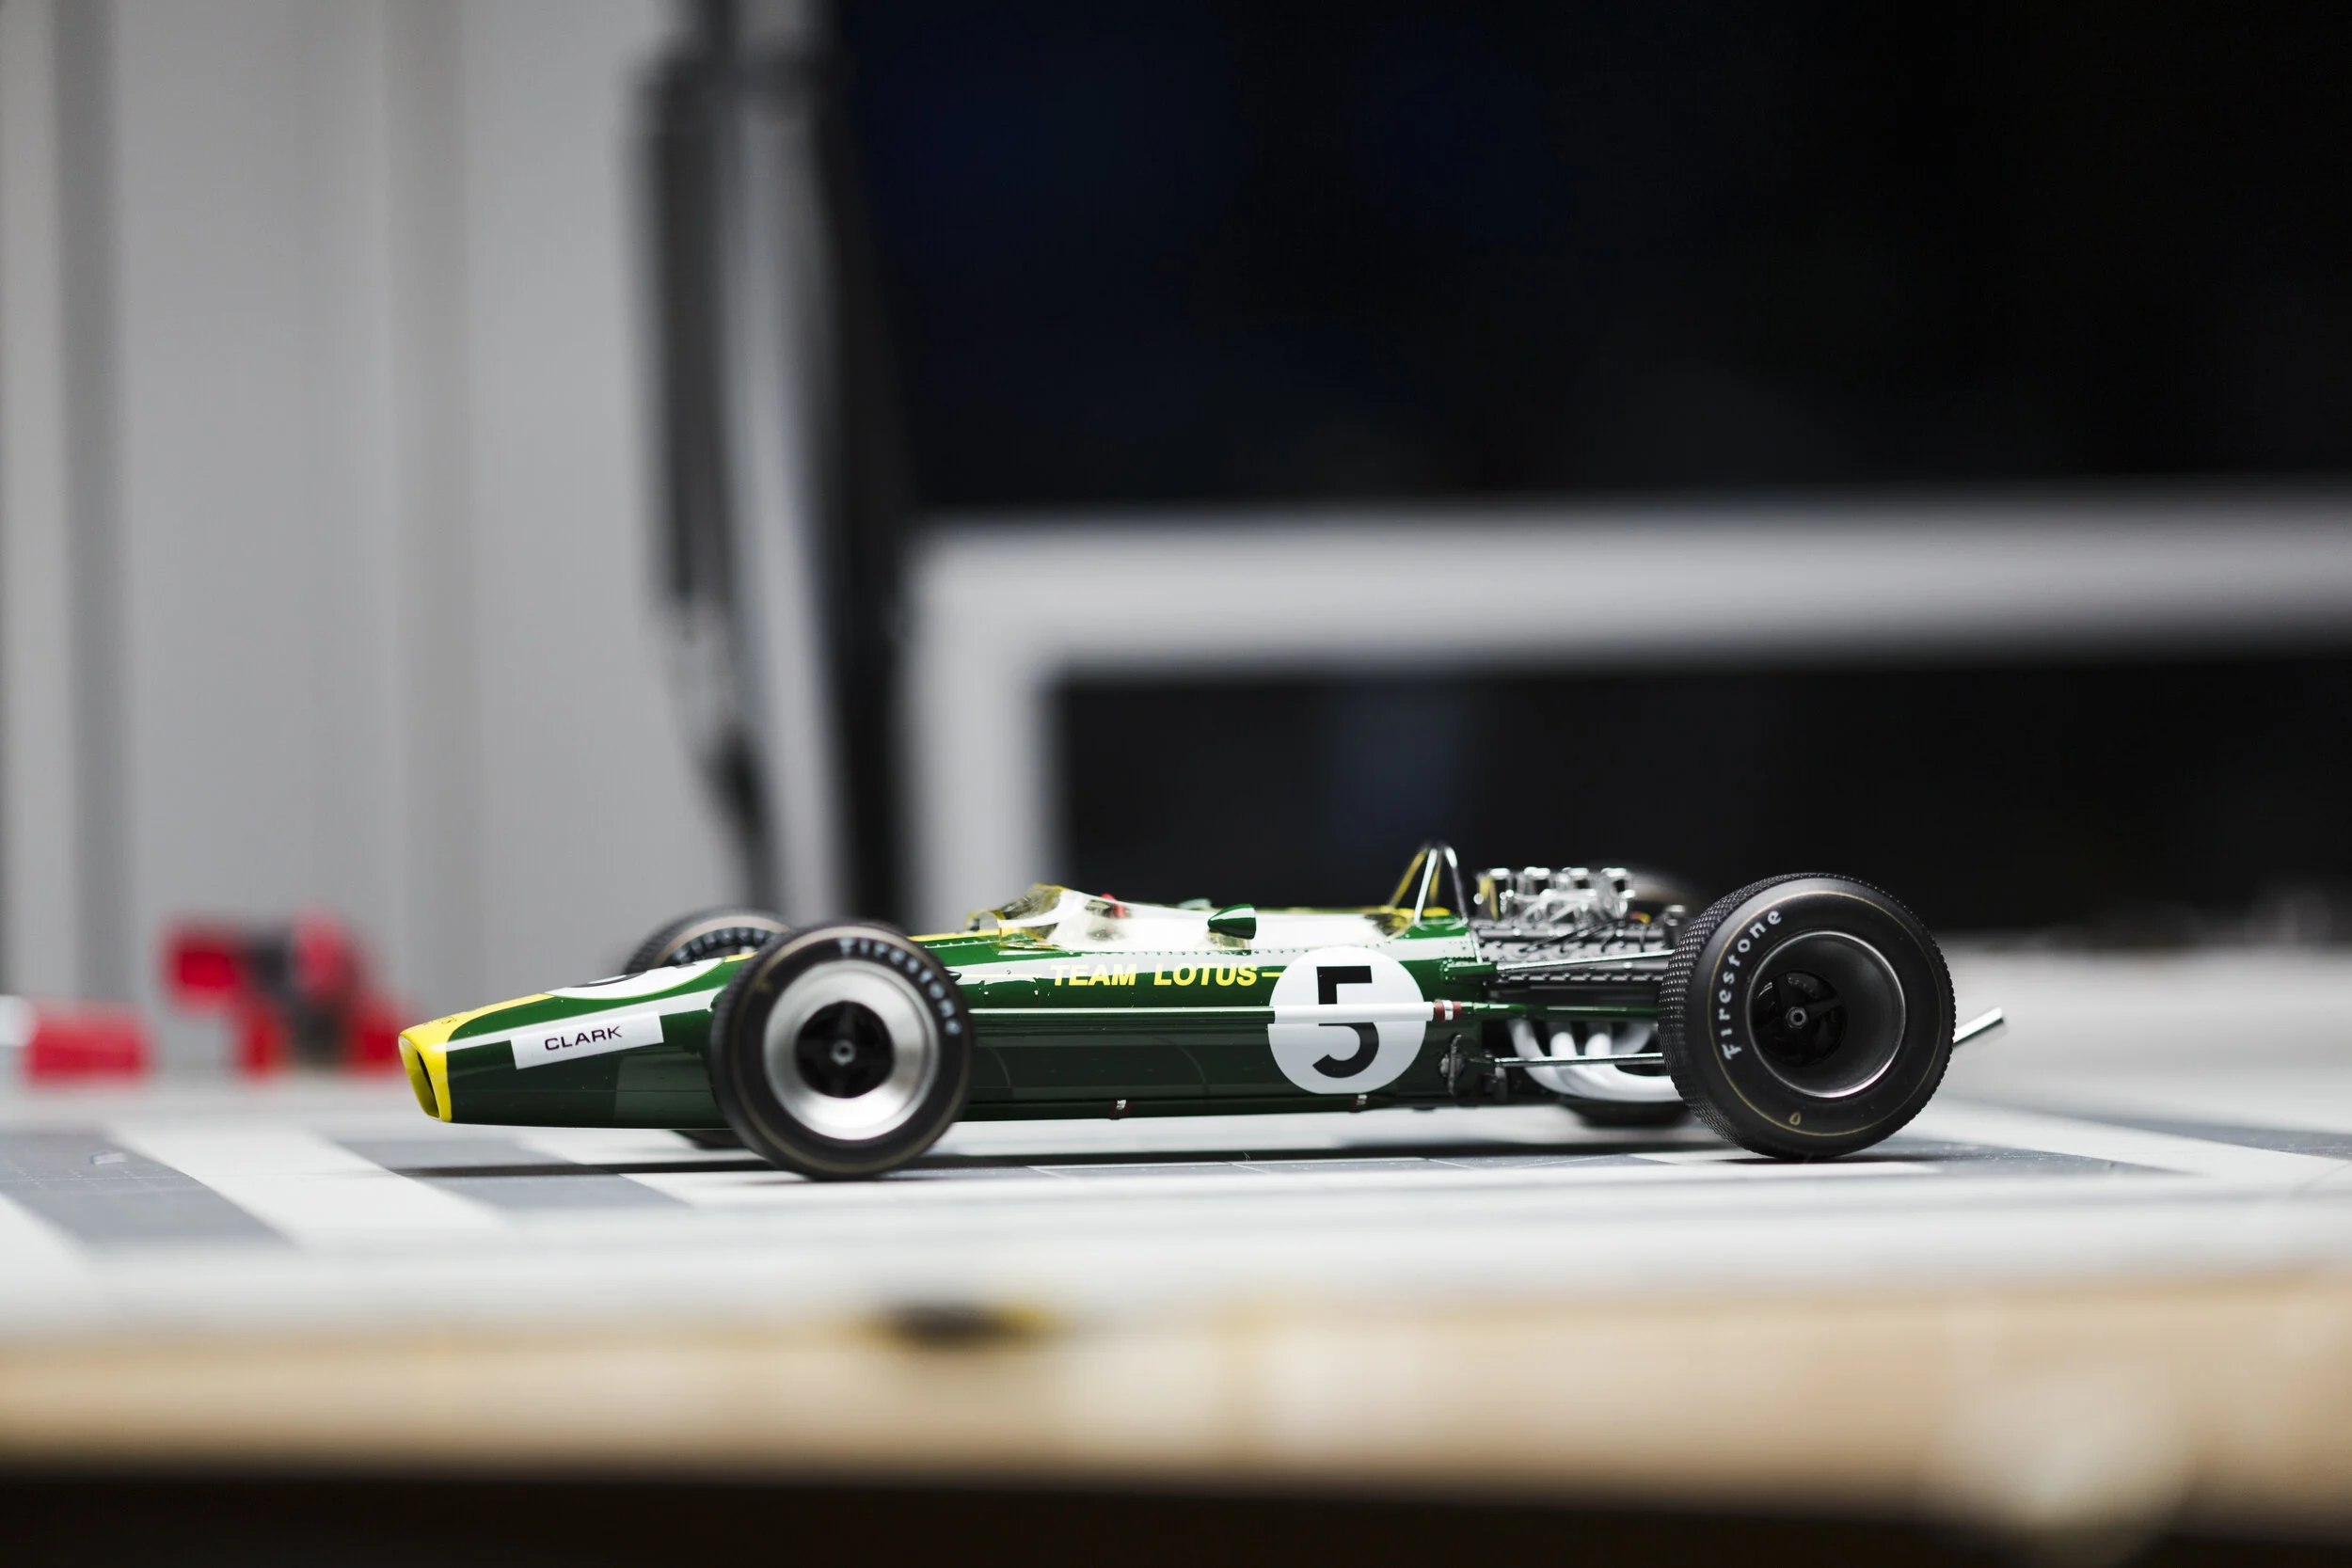
Ebbro 1/20 Lotus 49 Build
Ebbro 1/20 plastic kit.
This build spanned January - February 2020. I have reposted the original WIP thread here
First new build of 2020, I'm building this for my father so I'm hoping this will be a smooth and quick build. I'll see if I can complete it in under a month. I intend on building the 1967 US GP spec and it'll just be an OOB build.
I don't have too much to say about this kit so far. I've heard warnings about the front cowling not fitting properly so I sanded a bunch of it down from the inside. We'll see how it ends up.
Primed a lot of the parts in one go
White primer for the body and then painted most of the engine in day 2,
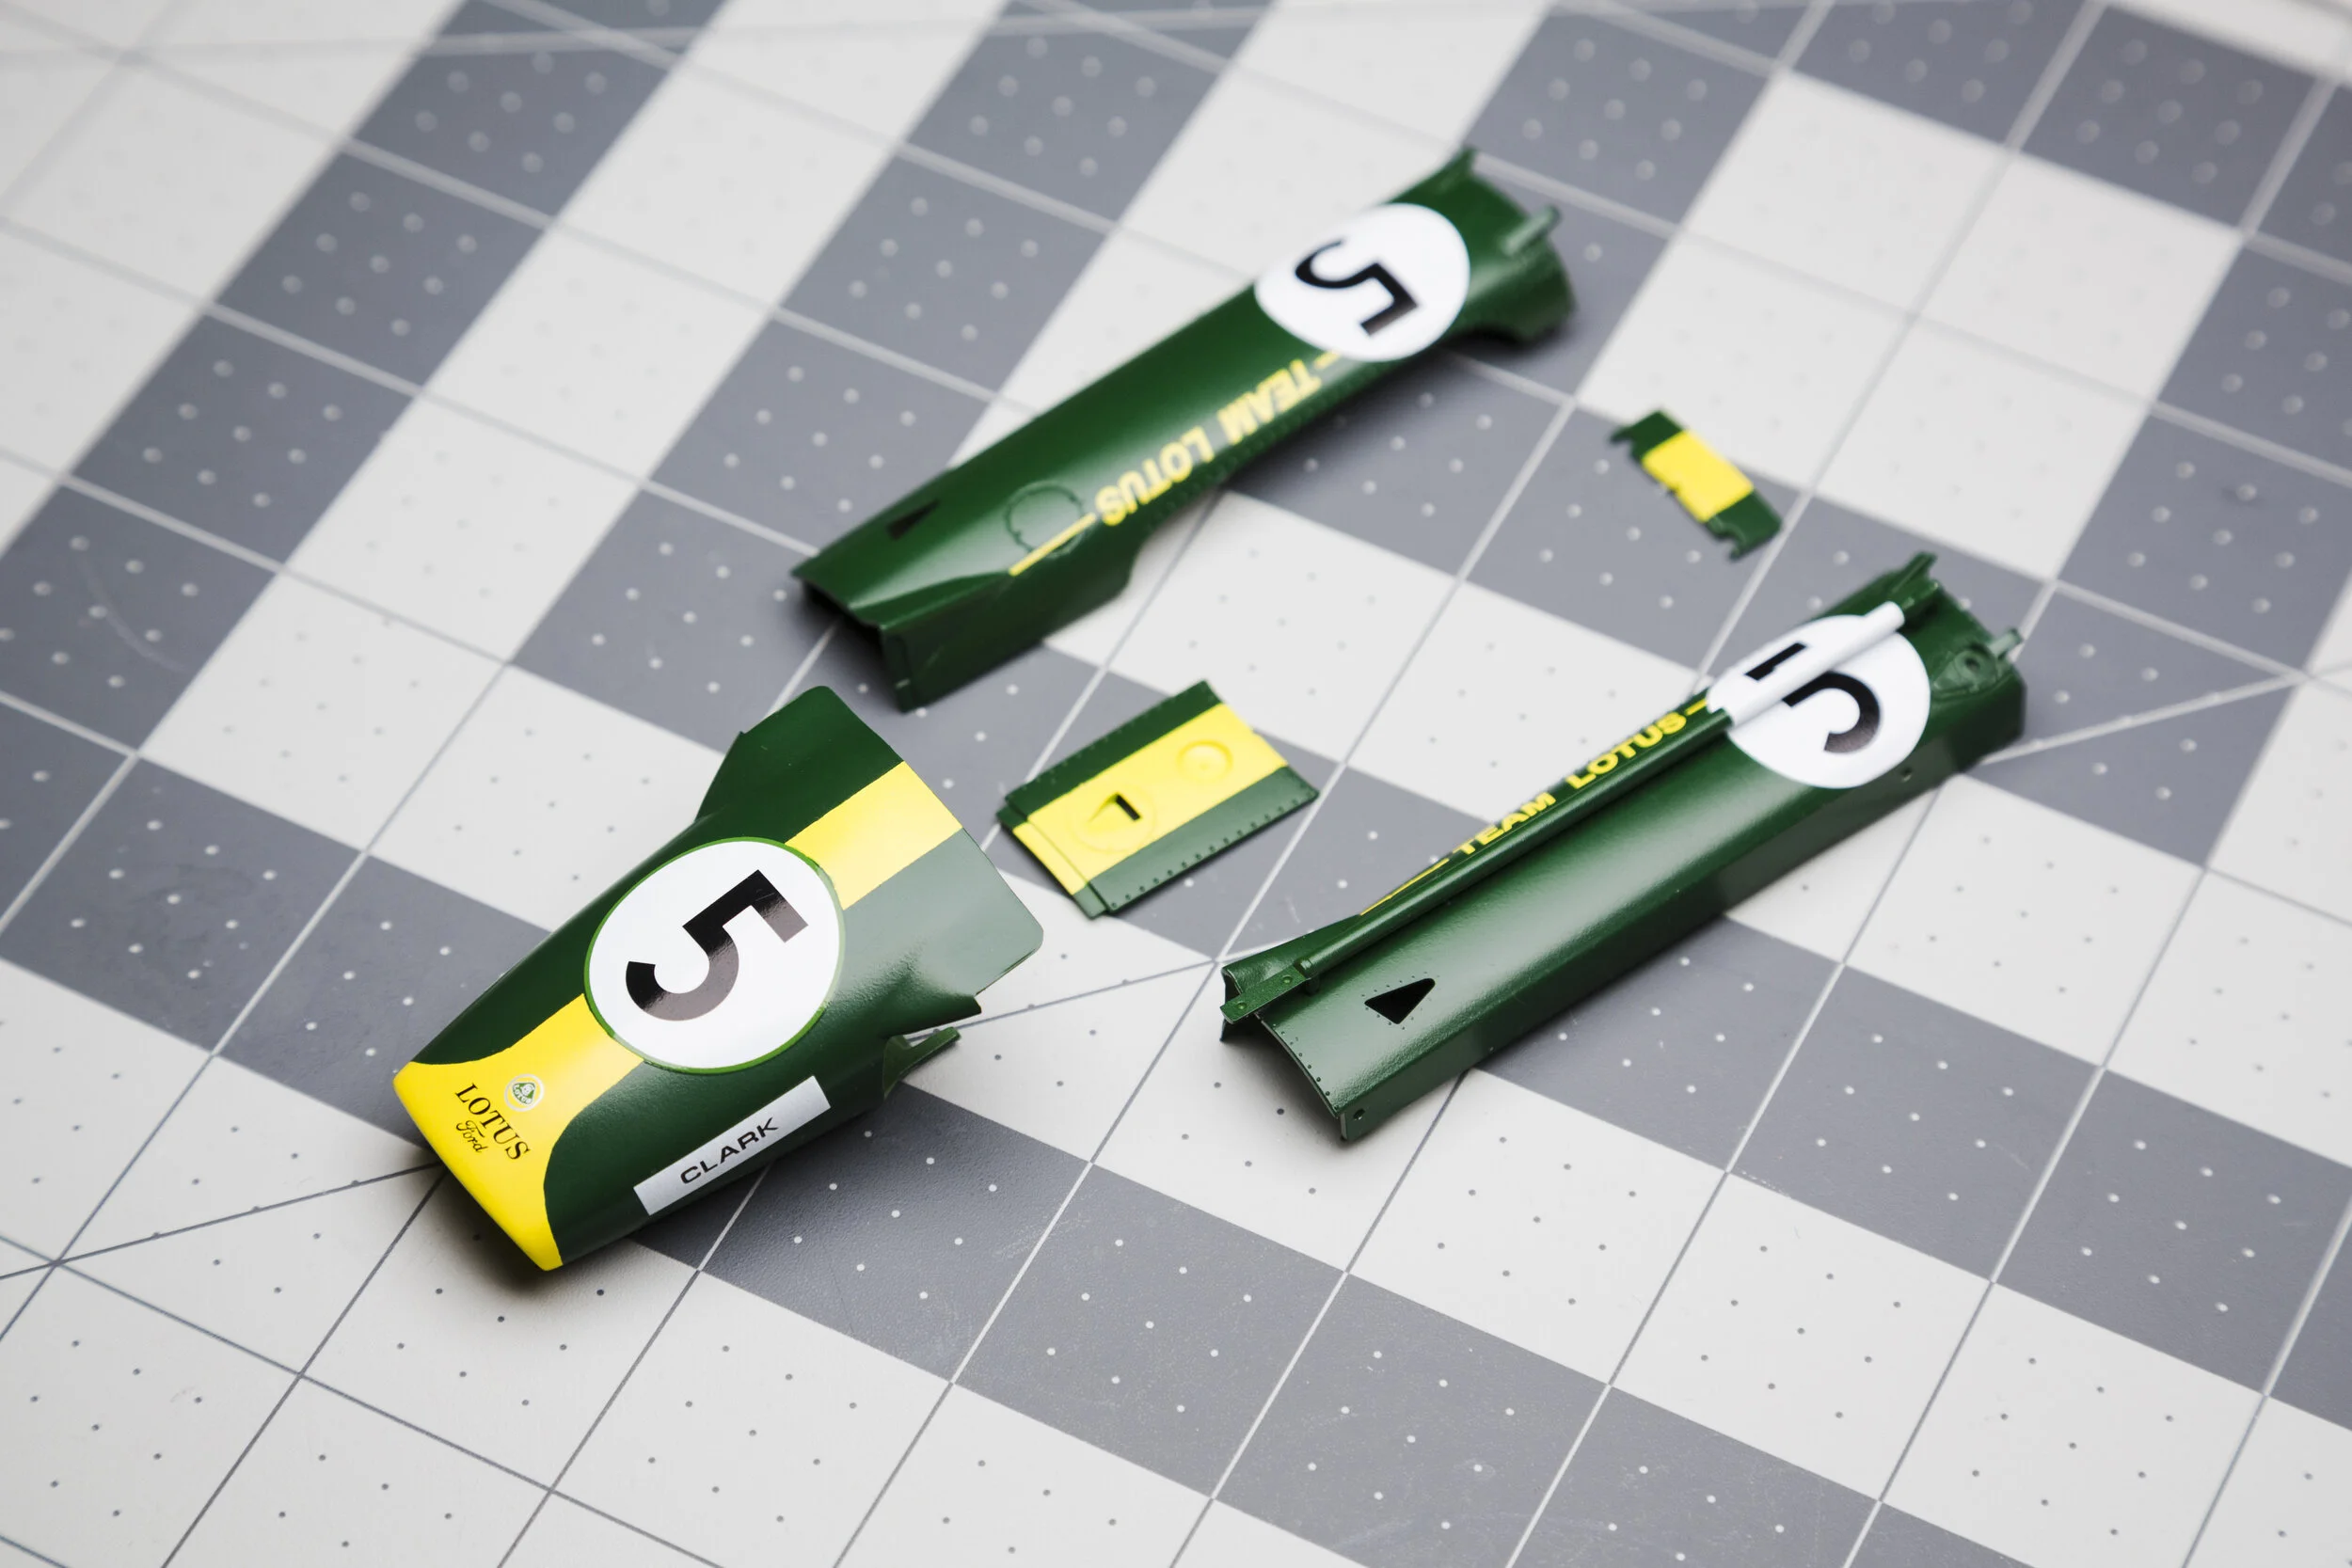
I'm using the Zero Paints Lotus 49 paint set, specifically matched to the Ebbro kit. All body parts got the yellow undercoat, and the stripe was masked to paint the green atop everything else. I'm always really nervous about masking and painting. This one especially, I had to cut smooth curves as well as have an accurate mask for the white circle. I wanted avoid painting one continuous yellow stripe as I was worried it would show through the white circle decal. I actually ended up crazing the plastic a bit since this was my first time using Zero Paints with my new H&S Infinity 0.4, it puts down a lot more paint than my old AB. I ended up sanding it back lightly instead of starting over. Hopefully the clear coat will smooth it out. I don't need a glass final look since these old cars had pretty low paint quality to begin with.
The green came out really nice. It's hard to see in the pictures though but I'd give my masking job a 6.5/10 in the end. I little bit of overspray and some ragged edges unfortunately.
I also noticed that the negative space left for the circle was maybe a bit skewed and I was hoping that the green edge of the decal would hide the sloppiness, but unfortunately it's still somewhat visible. I won't lose sleep over it, it's just not perfect, that's all. I can take solace in the fact that had I painted a solid stripe beneath the circle, it WOULD have shown through the decal, so I'm glad I tried taking the harder route at the end of the day.
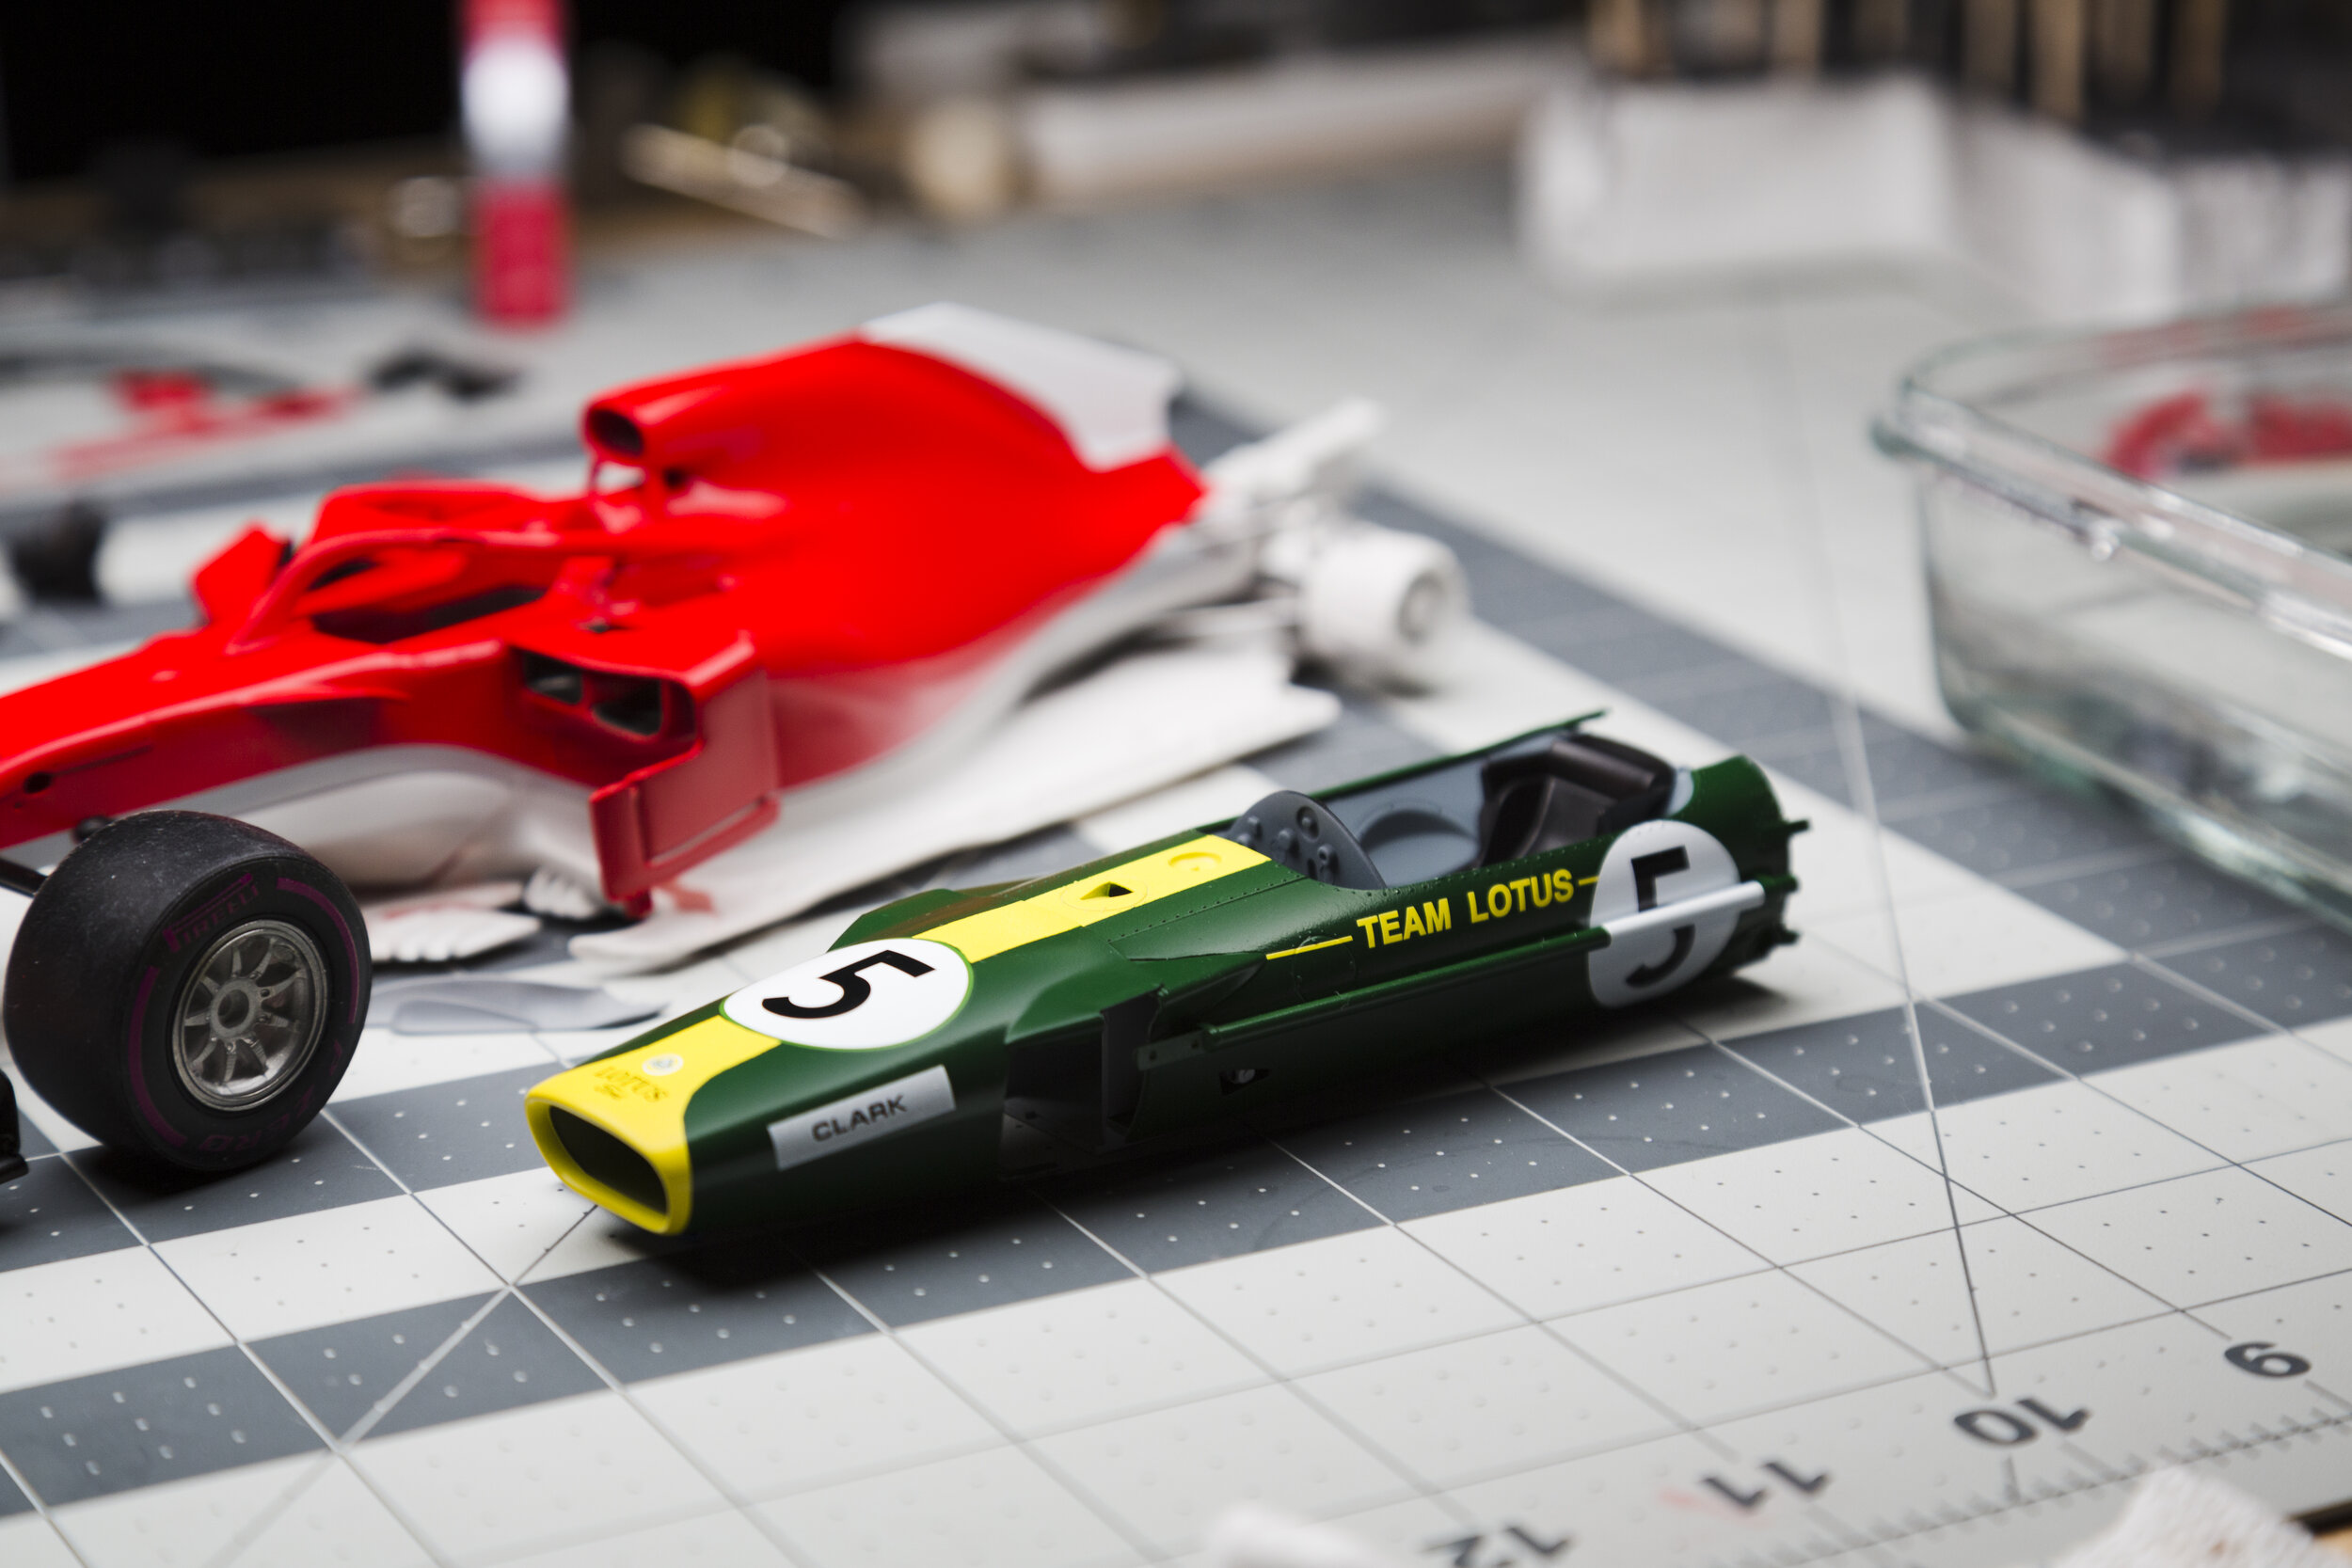
I learned the hard way that the supplied instructions are totally accurate, especially for the 1967 US GP. The kit doesn't include the appropriate name stickers for the sides of the nose, and Jim Clark's Lotus used the other body panel in front of the cockpit (Oil filler? Fuel filler?). That means I’ll need to use the other provided kit part, which I’m okay with because the incorrect one I painted crazed a bit and the masking was probably worst on that part specifically.
Once the new decals arrived on Thursday I was able to proceed. Even after application though it still didn't quite look right to me, and that's when I realized that the Indycals decals are probably still too small, and also that the nose number should be positioned closer to the front. I'm not really willing to fixing at this point so it's an unfortunate circumstance, but oh well.
I do love building these 60's cars because there are so few decals to apply.
Front end and rear end progress:
I was a little nervous to apply 2K clear with my new H&S Infinity 0.4 as I'd mastered applying 2K with my old Iwata NEO. I still keep underestimating just how much paint my Infinity is putting down so I laid the clear on a bit too thick for my liking. I also couldn't get the clear to settle down like a glass coat even with 2:1:1 clear:hardener:thinner ratio. I know this is a 60's car that shouldn't be super gloss, but to be honest I viewed this as a practice run for my SF71H which I absolutely do not want to screw up.
There was also some phenomenon I'd never seen before - it seems like the clear reacted with the paint in some way that left some areas slightly discoloured with a whitish-cast.
In this photo, looking on either side of the stripe you can see the whitish hue - kinda looks like I got poor coverage on the colour coat in that area. Look closely under the Clark sticker - you can see the faint outline of the old incorrect kit sticker that I'd previously removed. Definitely not a colour coat coverage issue.


This happened on the front cowling and the two side panels. I tried wet sanding the clear down thinking maybe some micro air bubbles got trapped or something but nothing happened. Maybe it was because I applied too thick of a coat. Another possibility is that my clear is just getting too old? I've owned this Zero Paints 2K Diamond Clear set for almost exactly 2 years, maybe it's time for a new set? Advice and theories are encouraged.
Here's the final state of the body panels after being polished back up. Again you can see that bit of discoloration on the front cowling, and if you look closely on the side panel you can see it below the word "Team". I'm still happy with the final result, I just don't want to mess around with it when I'm doing my SF71H.
The wheels were the last major hurdle to overcome in making this kit. I wanted to do my best to recreate that brushed metal look so the chrome was stripped (as it was on almost all other chrome pieces in the kit), and rather than applying a base of gloss black as one usually would before applying Alclad polished aluminum, I applied semi-gloss black and used some #0000 steel wool and swirled the areas that would become silver. I then masked off the centres of the front wheels which would remain black (awful task to do, really wished they were 2-piece) I sprayed the polished aluminum on them. Here are the results:
I'm pretty happy with how they turned out! The swirl effect is pretty good in real life, it looks a little uneven in the photo. Obviously not as good as a set of machined wheels, but I think I made the most of the kit ones.
The kit gives you the ability to add ignition wires without modification, but fuel lines require some drilling to add. I used MFH 0.4mm clear piping.
Miscellaneous pieces detailed - I'm still too lazy to replace moulded shocks with actual springs, but I think my technique is pretty passable. I painted the whole piece Alclad copper first, then masked off the middle to paint the rest aluminum. Then I simply hand painted the spring itself with Tamiya X-1. For the plumbing brackets/connectors I painted the areas with flat red acrylic, then cut a narrow strip of Aluminum tape to be the fastener.
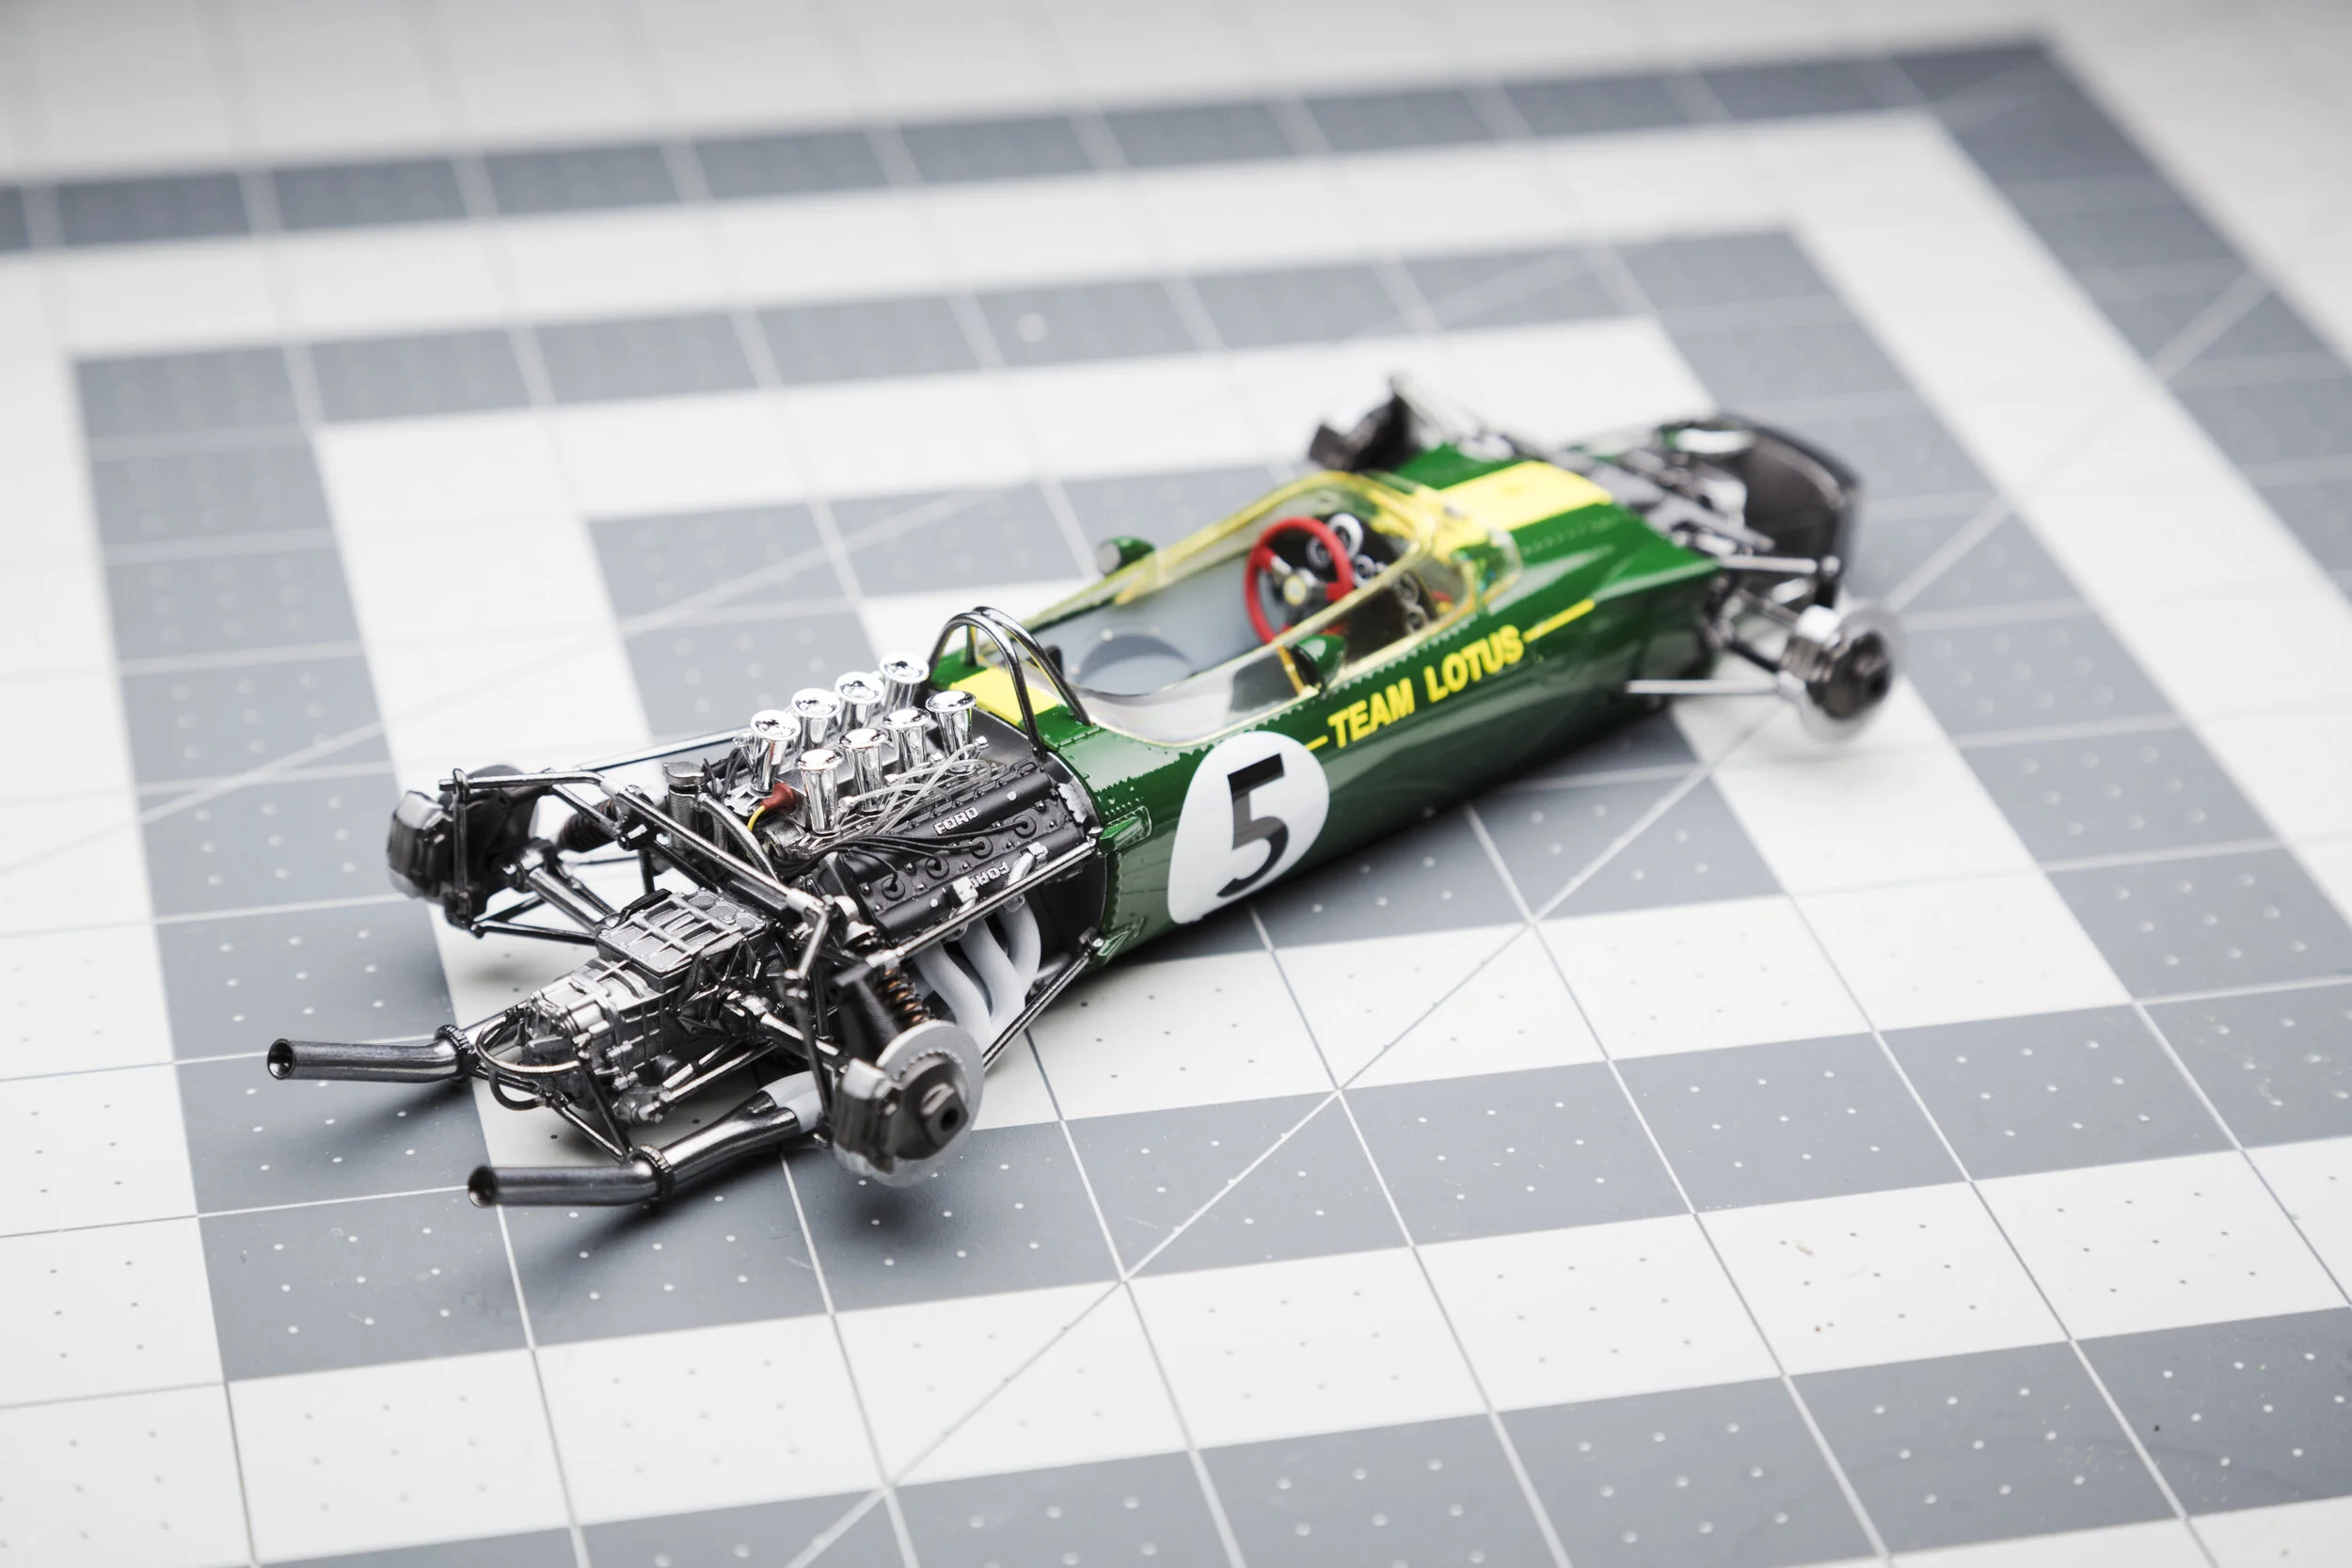
Here is the power unit nearing its final form. I'm very happy with how it turned out. The air funnels are the only kit parts I left chromed as they had no seams that needed sanding. I had to replace the little nub on each one with a metal wire pin in order to attach the fuel lines though.
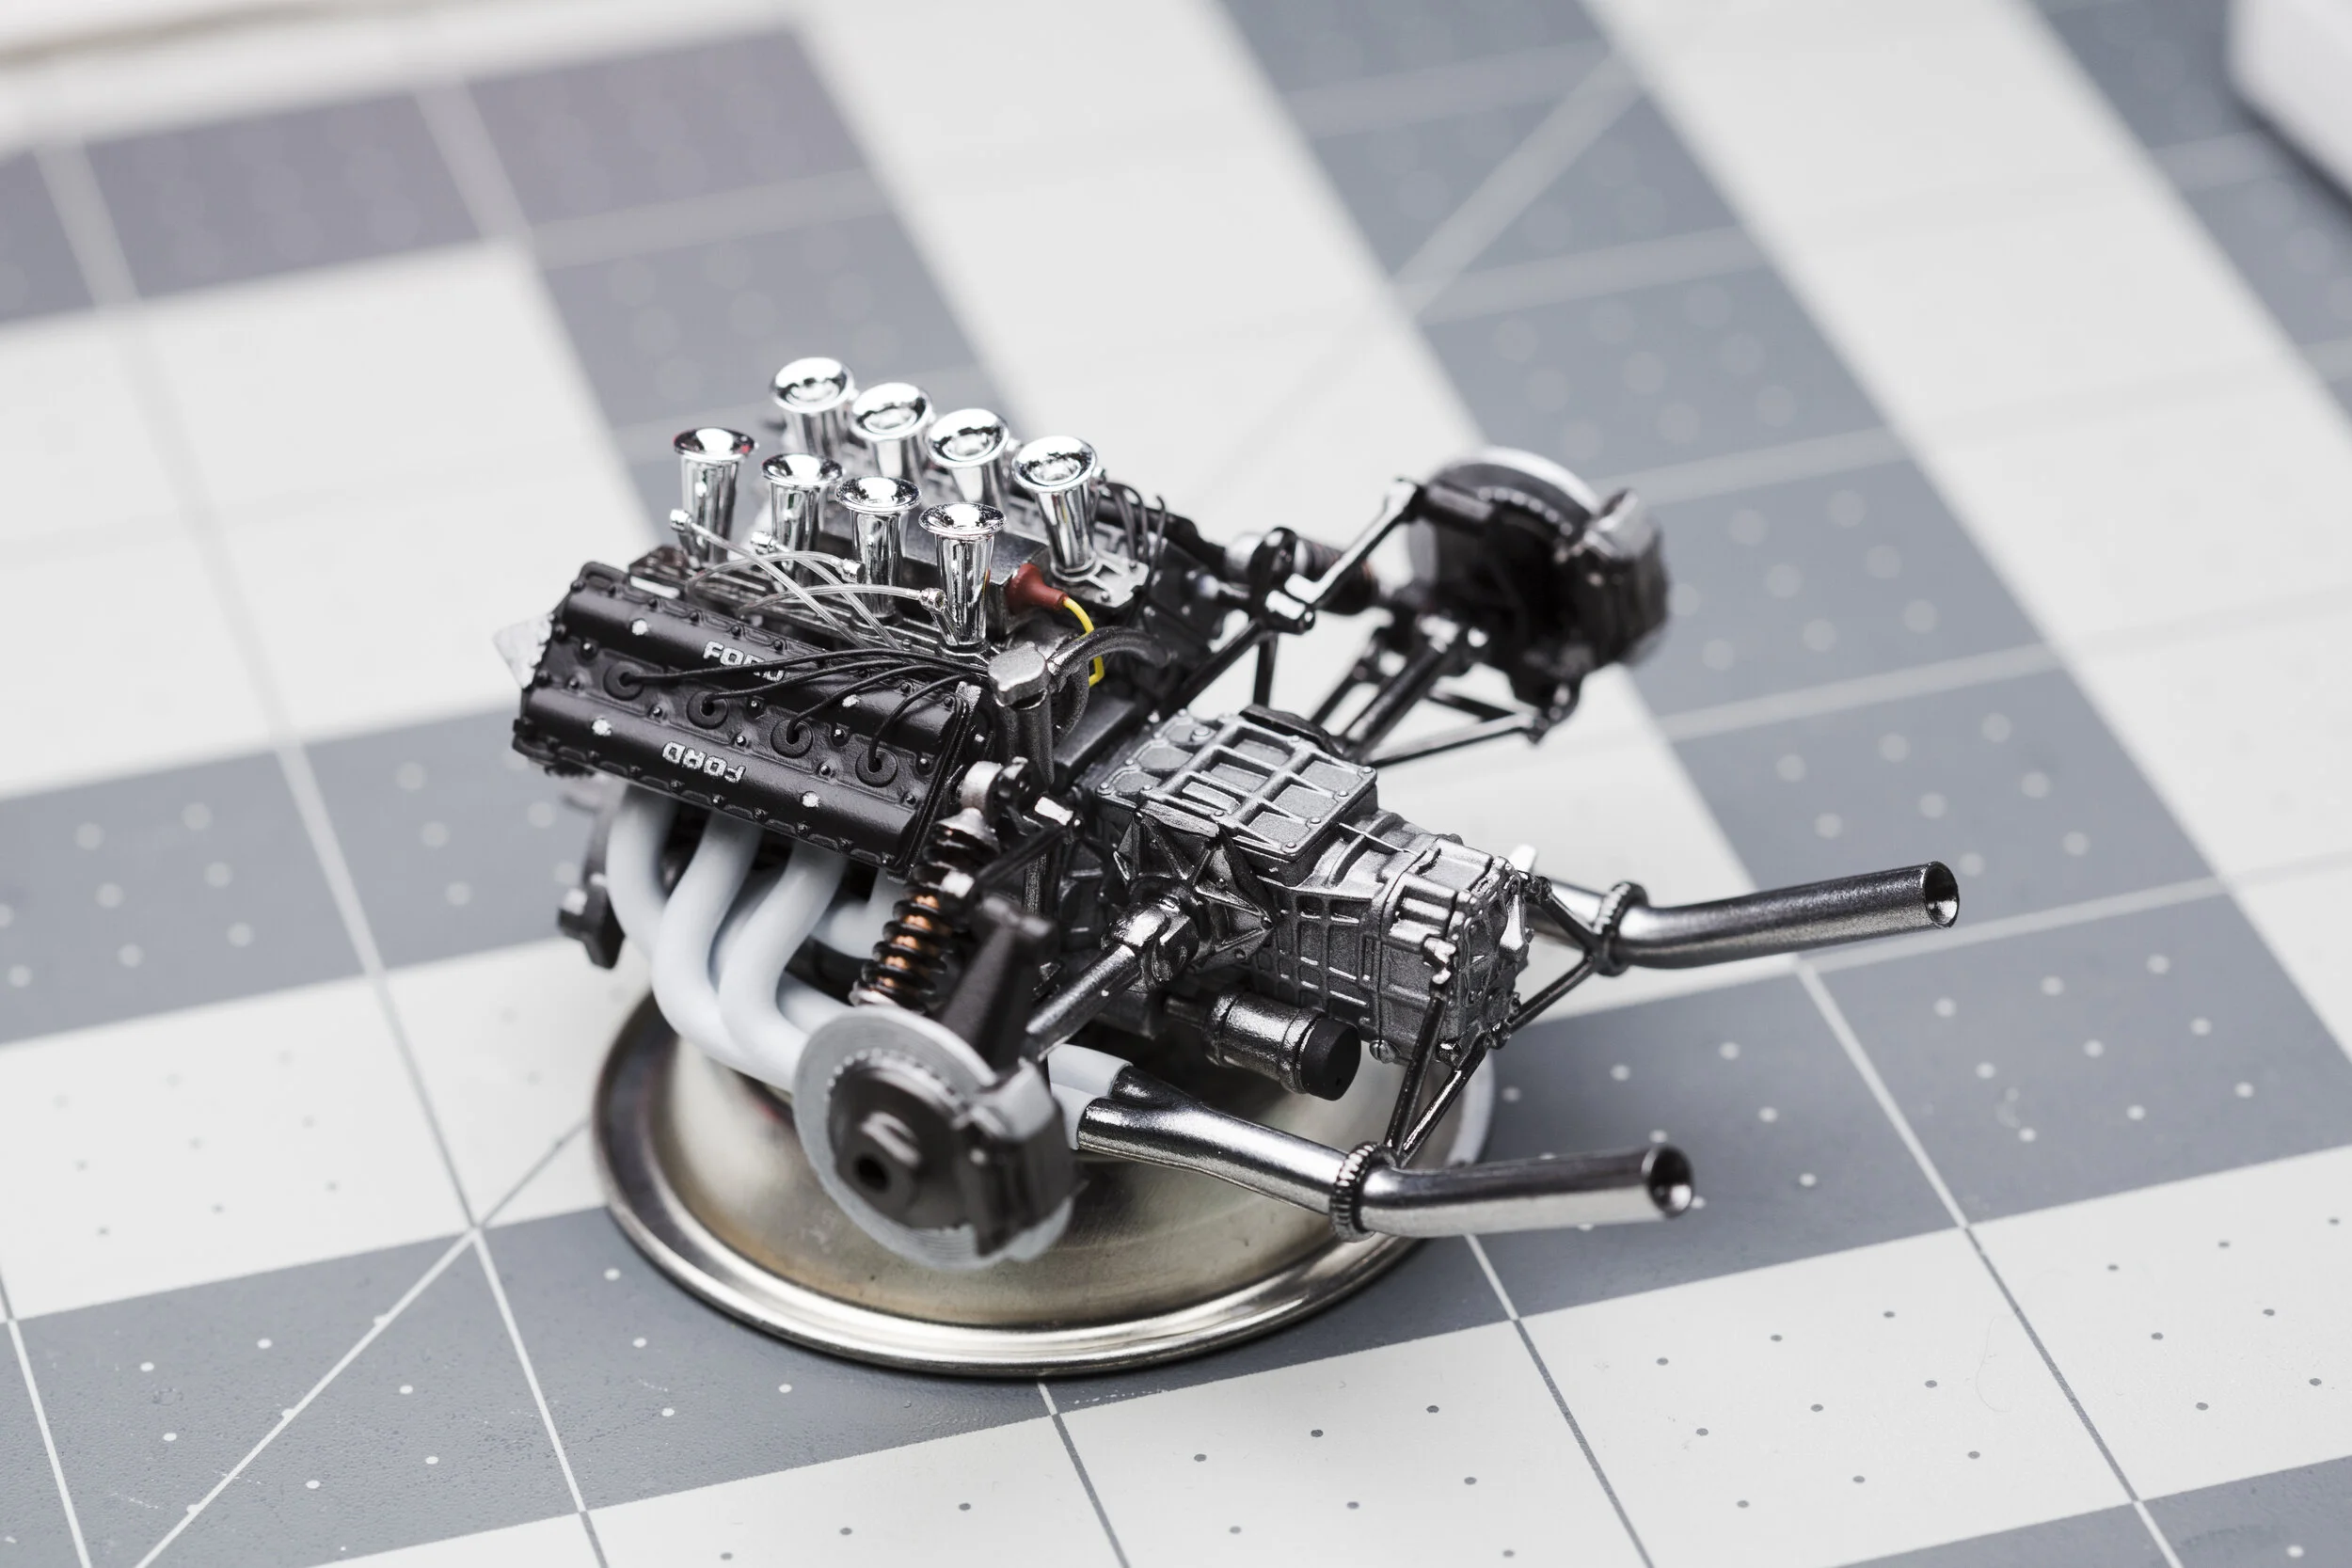

The rest of the chassis taking shape - I just added some simple wiring behind the dashboard and a few rivets. I think the gear shifter turned out quite nice.
Okay I'll just say this: every plastic kit I've done so far, I've vastly underestimated the final assembly stage. EVERY time it ends up being 8x messier or hectic than I expect. Previously glued things coming apart under slight pressure, things not quite fitting together like they should, etc etc. The front end of this kit was a NIGHTMARE to assemble. Everything from the front bulkhead to the suspension to the freaking radiator was just awful. The radiator in particular, as the supports are so thin. Everything was approximately a 90% fit. It was during this frustrating point that my hands started to get a bit clammy, and it was actually wearing away some of the Alclad metal paint…
Mating the chassis with the power unit was also a terrifying point because there's a plastic clip from the rear bulkhead that slots into the engine, but with the amount of force required to insert it I was sure something on the model would give way. Thankfully everything went fine with this step.


The rest of the assembly went okay, the double windshield was a little tricky to assemble with micro krystal klear, and my only other big frustration was inserting the wheels, as the plastic pins on the wheels wouldn't fit into the poly caps. I had to grind down the diameter of the pins in order to *very delicately* insert the wheels. There's no way the kit suspension could withstand the kind of force required to insert the wheels otherwise.
For the notorious front cowling, it turned out that *surprise, surprise*, I hadn't ground it down nearly enough initially. I was forced to take a dremel to the inside since 400 grit sandpaper was simply too slow. While initially the dremel seemed risky, there actually is quite a bit of material thickness so I wasn't worried about actually sanding through. There's still quite a massive gap but at least the bodywork overlaps now.
And that’s a wrap on this quick build! Check out the Gallery or click the image below to see the completed gallery for Jim Clark’s 1967 Lotus 49!